





Sills, drip flashings and canopies: facade junctions without infiltration
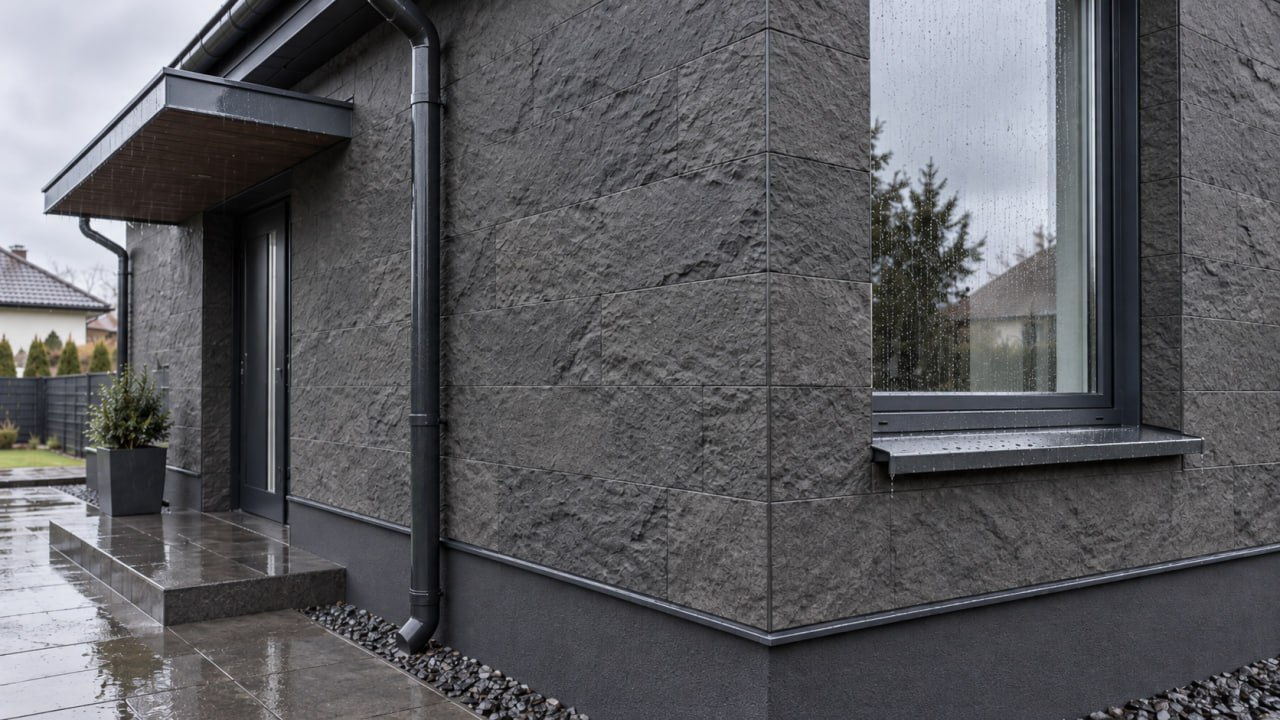
A beautiful facade can be compromised by one small mistake: an incorrectly executed junction. Water rarely damages a facade through the middle of a flat wall. It usually finds the weak points: the sills, the drip flashings, the canopies, the joints around the windows, the transitions to the plinth and the corners.
If these areas are executed incorrectly, damp patches, water marks, efflorescence, detachments and dirty streaks appear over time. That is why a quality facade begins not just with the choice of material, but with correctly protecting every area where water can accumulate or get inside.
Why are junctions the most vulnerable area of a facade?
On a flat wall, water usually runs down quickly. Near sills, drip flashings, canopies and decorative elements, however, it can accumulate, get into gaps and end up behind the finish.
Problems appear most often when:
- the drip flashing is fitted without a slope;
- the drip profile is missing;
- the sealant is applied carelessly;
- the sill is too short;
- water from the canopy runs onto the wall;
- the junction is made "butt to butt", without protection;
- the tile is cut into a strip that is too narrow;
- water drainage from the plinth area is not planned.
As a result, the facade may be new, yet after just one season it already starts to look aged.
Drip flashings: a small detail that protects a large wall
A drip flashing should not merely cover the lower part of the window. Its job is to lead water away from the facade. If water runs down the wall, the flashing is not doing its job.
A correct drip flashing must have:
- a slope towards the outside;
- sufficient projection from the wall;
- a drip edge;
- carefully executed side ends;
- a sealed junction with the window and the sills.
If the flashing is too short or almost horizontal, water will accumulate, run back and leave marks under the window.
Sills: where water appears most often
The external sill is permanently exposed to rain, snow, dust and dirt. That is why it must not direct water back towards the facade.
Typical mistakes:
- the sill is fitted without a slope;
- the edges are not protected;
- water runs down the window surround;
- the joint next to the window is poorly sealed;
- the drip profile at the bottom is missing;
- a vulnerable, unprotected joint remains under the sill.
Even a small gap next to the window can, over time, cause water marks, damp patches and damage to the substrate.
Canopies: protection for the entrance, or a source of run-off?
A canopy should protect the entrance area, not create new problems. If water is not drained correctly from the canopy, rain will run off the edges, reach the wall and soil the finish around the door.
When fitting a canopy, plan:
- where the water drains to;
- whether there is a drip profile on the front edge;
- whether water runs down the side walls;
- whether the junction with the facade is protected;
- whether moisture gets behind the finish;
- how the canopy integrates with the tile and the entrance area.
This matters especially above the entrance, because that part of the facade is seen every day, and any water mark immediately affects its appearance.
Sealing: not to hide, but to protect
Sealant must not be used to hide poor installation. Its role is to close a correct technical detail that was prepared in advance.
Good sealing needs:
- a clean substrate;
- a dry surface;
- the correct joint width;
- a compatible sealant;
- careful application;
- protection against permanent standing water.
Simply applying sealant over a dirty or damp joint will not solve the problem. Over time the joint can detach, crack or start letting water in. Facade sealants are construction products, and the requirements for them are set at European level by the Construction Products Regulation.
What is a drip profile and why is it needed?
A drip profile breaks the flow of water so that it does not "cling" to the lower edge and run down the facade. It can be a special profile, an edge or a correctly executed projection.
Without a drip profile, water often ends up where it should not: under the window, on the sills, on the wall, in the joint, on the plinth and behind the final finish.
That is why the drip profile is not a decorative detail but a functional element of facade protection.
How flexible tile integrates with sills and drip flashings
The final cladding has to meet the drip flashings, sills and canopies cleanly. No accidental gaps, weak edges or narrow strips should be left in the junction areas.
KORDEKO flexible tile (PletaFlex) suits facades with complex details: it can be used on walls, the plinth, sills, the entrance area, corners and near decorative elements. But the result depends on how correctly these areas are prepared.
It is particularly important to plan the layout around the windows and the entrance in advance, so that the tile does not meet the drip flashings as small, random pieces. That is why flexible tile installation starts with the details, not with the large surfaces.
If the facade is insulated, the junctions are designed in advance
When facade insulation is carried out, every detail becomes even more important. The system includes the insulation, the reinforcing layer, the mesh, the adhesive, the primer and the final cladding. If water gets in at one vulnerable point, the problem can affect not just the outer layer but the whole system.
Particular attention goes to:
- the window sills;
- the lower line of the drip flashing;
- the top of the plinth;
- the entrance area;
- the fixing points of canopies;
- the joints with cornices;
- the areas under downpipes.
A correct junction has to be not just "nice on the surface" but protected inside as well.
Typical mistakes on site
- The facade is done first, and only then is it decided how the drip flashings will be fitted. Cuts, alterations and joints made "as best we can" follow.
- The drip flashing is fitted without sufficient projection. Water falls straight onto the wall or the plinth.
- The drip profile is missing. Water is drawn under the edge and runs down the facade.
- Sealant is applied to an unprepared surface. The joint quickly loses its seal.
- The side ends of the drip flashing are not protected. Water reaches the sills and leaves stains.
- The tile is cut into a strip that is too narrow next to the window. Such an area looks weak and can deteriorate faster.
A mini-checklist for junctions without infiltration
Before the facade is finished, check that:
- all drip flashings slope towards the outside;
- the drip edge breaks the flow of water correctly;
- the flashing projects far enough from the wall;
- the side ends are protected;
- the junctions with windows and sills are sealed;
- the canopy does not drain water onto the facade;
- the tile integrates cleanly into the details, without narrow, random strips;
- the substrate is dry, sound and primed;
- water is led away from the plinth, not towards the wall;
- every joint is planned before the final finish is installed.
Conclusion
Infiltration on a facade most often comes not from the cladding itself but from weak junctions. Sills, drip flashings, canopies, drip profiles and sealing have to work as a single system that leads water away from the wall.
KORDEKO flexible tile helps create a neat, practical facade, but it has to be installed together with correct technical details. Then the walls stay dry, the plinth gets less dirty, and the facade keeps its clean, finished look for longer.
Frequently asked questions
Why do run-off marks appear under windows even when the facade is new?
What is a drip profile and why is it needed?
Can sealant repair a badly made junction?
Need advice on your facade?
- ·Get a free consultation for your project
- ·Find out which material suits your facade
- ·We'll answer all your questions and help you choose